■ 프론트엔드 ■/React
Vite + preact + typescript 조합 사용시 proxy 설정
serpiko
2022. 8. 16. 17:20
vite 번들러를 사용한 proxy 설정
1. vite 로 preact-ts 설치
$ yarn create vitehttps://vitejs.dev/guide/#trying-vite-online
Vite
Next Generation Frontend Tooling
vitejs.dev
이후 설치 질문이 나오는데 설치하고자 하는 앱을 선택한다 ex) preact-ts
2. 설치된 vite에서 vite.config.ts 파일의 proxy 설정
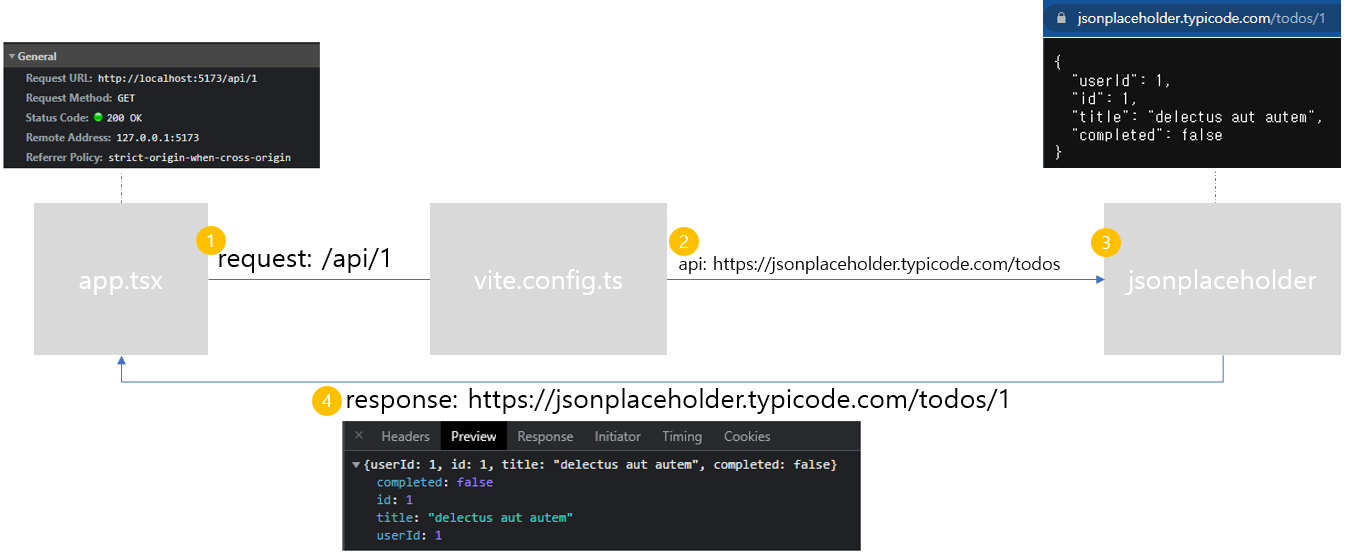
vite가 설치되면 root의 vite.config.ts 파일 설정을 통해서 proxy 를 적용할 수 있다.
API를 적용하기 위해서 jsonplaceholder 의 https://jsonplaceholder.typicode.com/todos/1 를 예로 들겠다.
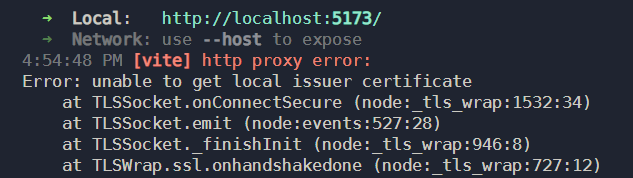
주의!!. proxy를 설정할때 주의사항은 secure에 false를 해야한다는 것이다.
그렇지 않으면 아래와 같이 http proxy error가 뜬다.
vite.config.ts
import { defineConfig } from 'vite'
import preact from '@preact/preset-vite'

// https://vitejs.dev/config/
export default defineConfig({
  plugins: [preact()],
  server: {
    proxy: {
      "/api": {
        target: "https://jsonplaceholder.typicode.com/todos",
        changeOrigin: true,
        secure: false,
        rewrite: (path) => path.replace(/^\/api/, ""),
      },
    },
  },
})
3. proxy 설정된 /api 를 사용
app.tsx 에서는 다음과 같이 사용한다
import { useState } from 'preact/hooks'
import preactLogo from './assets/preact.svg'
import './app.css'
export function App() {

    // proxy 적용
    (async function () {
        await fetch(
          "/api/1"
        ).then((response) => {
          console.log(response);
        });
      })();

 	return (<div></div>);
 }
정리